Building a Better Battlefield: My Journey to a Custom Mordheim Board
| 5 min read
Last week, I had a lot of free time, so I improved my fantasy terrain for an upcoming Warhammer meetup with my friends. One thing I always wanted to have is a nice playmat. After binge-watching BillMakingStuff on YouTube, I stumbled upon his Yoga Mat Board video. So, I ordered some mats from Amazon, stole some sand from the local playground, and got to work.
Preparing the Mats

When getting mats for this project, make sure they have a flat side. I'm not sure if there are mats that are textured on both sides, but it's still something to look out for. Also make sure, that each of the tiles is about 1ft by 1ft. This makes them a pretty convenient size for wargaming. So, I got these mats from Amazon, took 9 of them for a 3' by 3' board, and started by marking the middle of each edge for the connecting paths. I made them a bit wide, but it wasn't a problem, I think. Then, I drew the paths I wanted on the mat and tried carving them out with a knife. That would've taken way too long, so I cut some tiles out of thin EVA craft foam and scattered them across the mat, where the paths are supposed to be, gluing them on with PVA glue. I also glued those edge pieces on. Don't know if that really does anything, with all that glue that will be on top of the mat later. It at least made me feel better.
Crustard Time

After letting the PVA dry, it was time to apply the crustard. Crustard is, as Bill explains in the video, a mixture of different kinds of sand, PVA glue, and acrylic paint. It's basically a homemade texture paste. This is a handy recipe since you can use any color you want for this. A tip that Bill also mentions in his video: try to not have to mix the paint you want and buy a big pot of the exact color you want. I didn't find any ochre yellow paint at my local dollar store, so I mixed my own color with brown and yellow. The color then varied a bit between the tiles because I didn't make a big enough batch, but the wash I used later is the same batch on the whole piece, so it's not that noticeable. Another thing I should've watched out for was to make sure that the crustard didn't dry in the puzzle piece parts in between the mat. When putting the mat together and apart, these bits rub against each other and it's coarse, rough, irritating, and gets everywhere. I don't like having to get my vacuum out after each game, but it will hopefully get better over time.
Washing and Drybrushing

After putting on the crustard and letting the whole thing dry, I went over it with an orangey drybrush and a homemade wash. This wash was just black and brown paint mixed with PVA glue, water, and a bit of dish soap. I slopped it on everywhere and dried that with a hairdryer because I am an impatient little grub. Afterwards, I gave the whole thing a drybrush with a yellowy off-white and was done.
Results and a First Round of Frostgrave

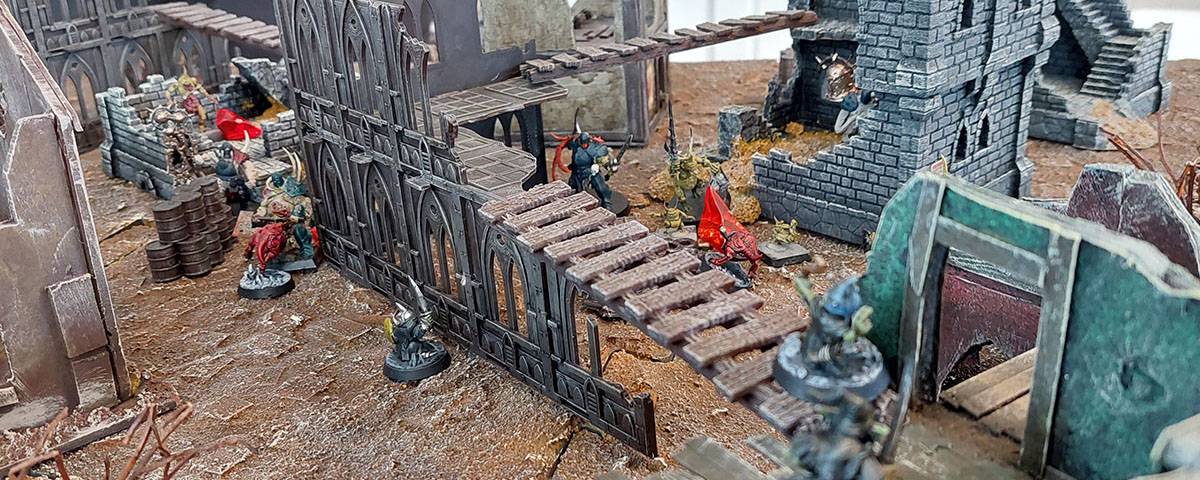
It turned out pretty nice, and during the process of making the mat, I also painted all my 3D printed Ulvheim buildings. Adding some crustard to them and giving them the same wash and final drybrush really made them fit with the board. It was pretty fun to make, and I am pretty proud to finally have a decent-looking board to play skirmish games on. This whole project also got me interested in Mordheim again, so watch out for a post about a Cult of the Possessed warband I am building.

After playing our first game of Frostgrave on this board (the Nurgle Warband being a work in progress by my friend Tom), I can definitely say that this project really elevated our play experience. The table looks fantastic compared to our usual green felt or the bare table peeking between the buildings. This setup truly makes it feel like a real battle is happening right under our fingertips.

If you’re thinking about building your first board for playing wargames, I highly recommend trying this build. It's pretty easy to make, looks great (if you can live with the puzzle lines), and is quite portable. Price-wise, it depends a bit. I don't think I saved much money compared to a printed mousepad mat of that size from gamemat.eu for example. There a 3'x3' mat costs 39€. Most of the budget was the mats (About 26€ for the mats, 10€ for paints and glue. Sand is free if you can find a playground!), but I also have more tiles left over to expand to a 4' by 4' board. Maybe you have some mats left over from your home gym or can find them cheaper, then it might be more worth it, if money is you main concern. If you enjoy crafting though, it's definitely worth your time. So, happy crafting and see you in the next one!
